You probably have a path in mind already. The one you meant to “sort properly this year” and now tiptoe along, dodging dandelions, self-seeded grass and that one nettle that always seems to find bare skin. A quick blast of weed killer would be easy. So would rolling out a black plastic membrane and pretending it’s not slowly surfacing in tatters two years from now.
But there’s another option that looks scruffy for about half an hour, then quietly does its job for a whole season: cardboard. Plain, brown delivery‑box cardboard, layered like lasagne under your feet. No chemicals, no woven plastic, no special kit-just a bit of overlap, some water and the right topping.
The first time you do it, it feels almost too simple. The second time, you’re saving boxes on purpose and eyeing every parcel as future paths.
The quiet barrier that blocks weeds, not life
Think of cardboard as a temporary, breathable blindfold for the soil. It shuts out light, so most annual weeds can’t photosynthesise and simply give up. At the same time, it still lets water through and slowly softens, inviting worms and fungi to turn it into better soil underneath.
That’s the crucial difference from plastic membrane. Plastic sits there, trapping moisture in the wrong places, fraying at the edges and tangling itself into every fork tine you own. Cardboard does the job and then leaves, breaking down over a season or so without a bin run or landfill guilt.
Compared with weed killer, the trade‑off is time, not risk. You’re not trying to poison what’s there; you’re starving it of light until it surrenders. Tough perennials might still push through in places, but instead of fighting a whole carpet of growth, you’re dealing with the odd stubborn shoot.
You get:
- Clear, walkable paths for a full season (often longer).
- Softer, richer soil underneath for when you eventually replant.
- A use for the mountain of boxes that keep arriving at your door.
Step‑by‑step: build a cardboard path in an afternoon
You don’t need to strip everything back to bare earth or hire a rotavator. You’re creating a layered sandwich:
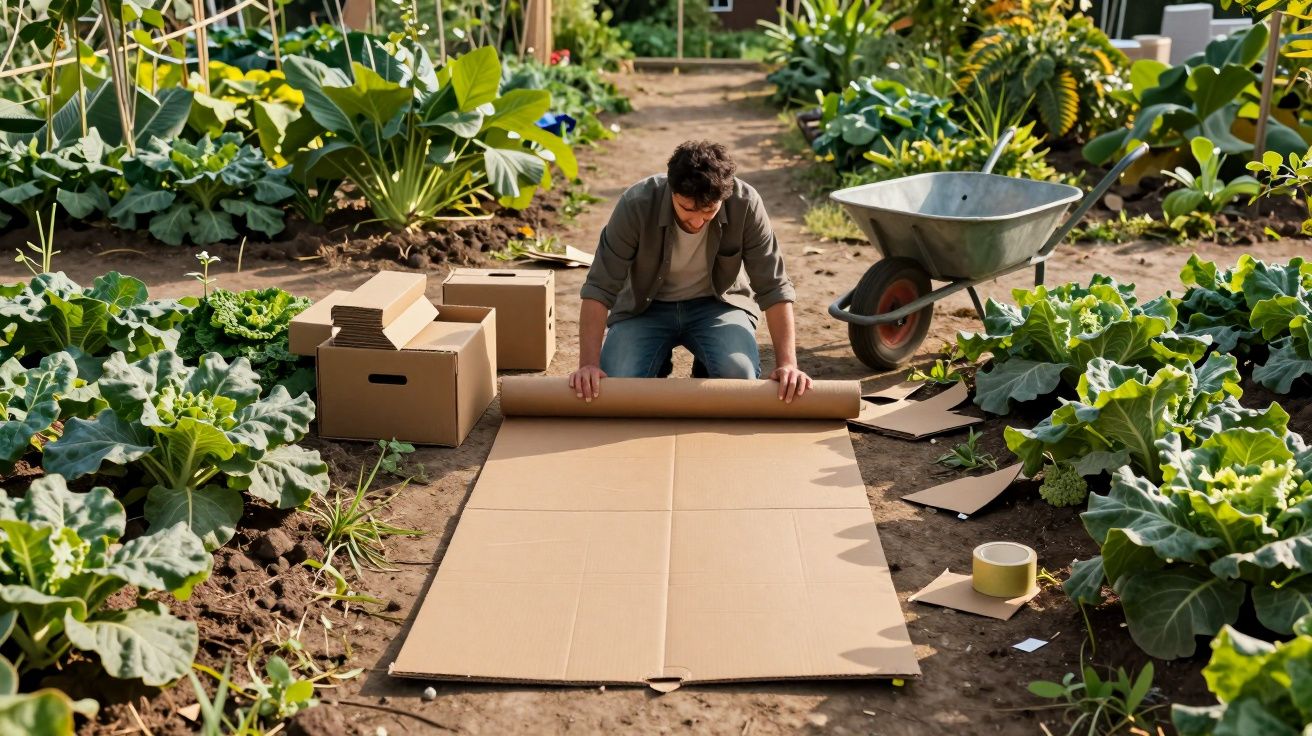
Mark and roughly tidy the route
Decide exactly where the path will run and how wide you want it. Kick away big stones, sticks and anything sharp enough to pierce cardboard. Strim or mow tall growth down low if it’s jungly; you want a flat-ish surface, not bare soil.Gather the right cardboard
Go for:- Plain brown boxes, not glossy or heavily inked.
- As large as possible to minimise joins.
- All tape, plastic labels and staples removed.
Flatten everything and sort out the pieces with the fewest creases for your top layer.
Lay the first layer, overlapping generously
Start at one end and work backwards so you’re not constantly stepping on your work. Overlap each piece by at least 10–15 cm, like roof tiles. Pay attention to edges; weeds are experts at finding hairline gaps.Add a second (and even third) layer where weeds are worst
On nasty patches-couch grass, ground elder, creeping buttercup-simply repeat the overlap with another layer. Two layers is usually enough; three if you’ve inherited an allotment that looks feral.Soak the cardboard
This is the unskippable step. Water the entire surface until it’s properly damp through, not just spotted. Wet cardboard:- Moulds itself to the ground instead of lifting.
- Begins to soften and knit together.
- Stays put long enough for the topping to lock it in.
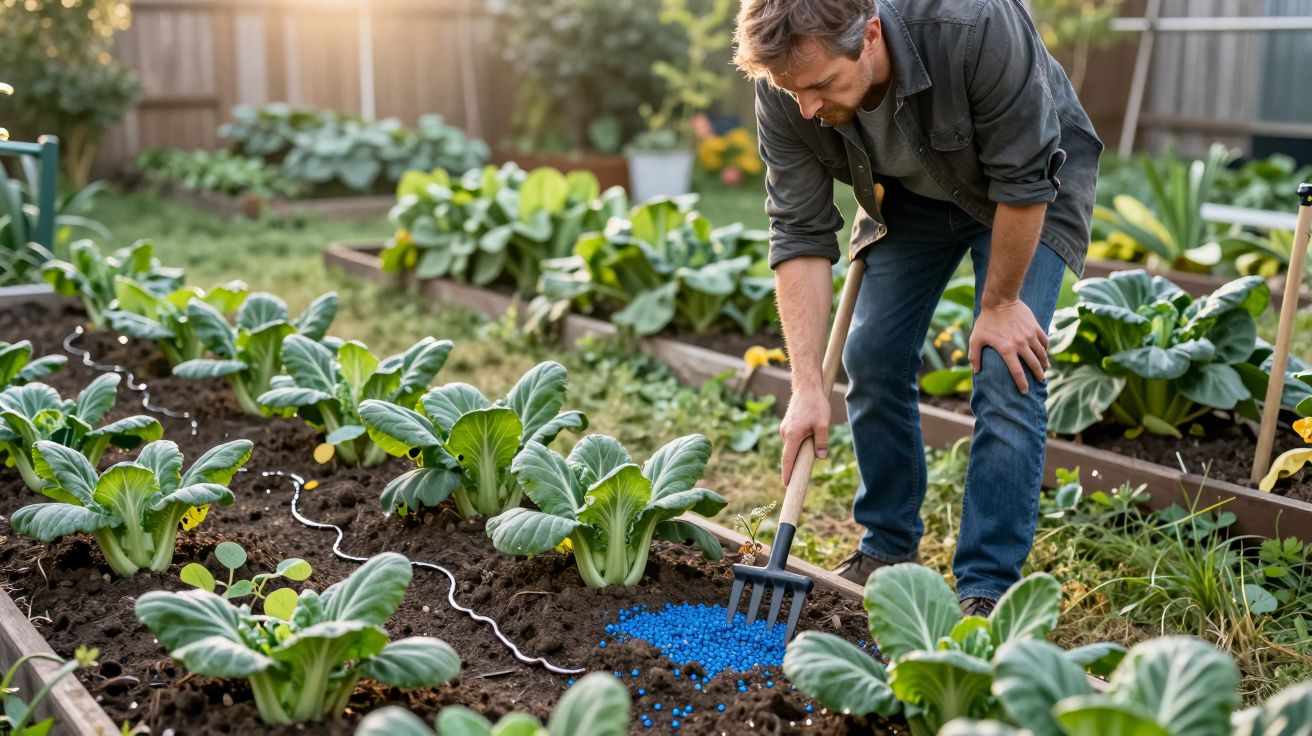
Add your topping, 5–8 cm deep
The topping is what makes it look like a path instead of a recycling accident. Good options:- Woodchip or bark for veg‑plot and orchard paths.
- Gravel for more formal or front‑of‑house paths (just expect the cardboard to rot away faster underneath).
- Compost or leaf mould if you want a soft, earthy path between beds.
Spread it evenly. Aim for at least 5 cm depth; thin spots invite weeds back early.
- Pin or weigh down the vulnerable edges
Along the sides and at the ends, tuck the cardboard up slightly and:- Hold it with bricks, logs or stones, or
- Peg it with cheap metal U‑pins or homemade bamboo pegs.
The goal is simple: no flapping, no obvious entry points for wind or roots.
Walk it once or twice. It should feel firm, not squelchy, and look like it’s been there longer than an hour. By the time you’ve done a second path, the first will already be settling in.
Where cardboard paths shine-and where they struggle
Cardboard isn’t a miracle, but it has very clear sweet spots in a garden.
Ideal uses:
- Vegetable garden paths between beds, where you change the layout every year or two.
- Allotment access routes that need to be cheap, quick and easy to re‑shape.
- Behind sheds, along fences and side alleys where you mostly just need “not a jungle”.
- Under washing lines or play areas where you want dry feet but don’t want permanent hard landscaping yet.
Trickier spots:
- Steep slopes, where topping slides and cardboard follows.
- Very exposed, windy sites if you can’t weigh edges properly.
- Permanent driveways and heavy‑use car parking, where long‑term hard surfaces are safer.
A quick comparison helps:
| Spot type | How well cardboard works | Extra tip |
|---|---|---|
| Veg beds / allotments | Excellent | Top up woodchip each spring. |
| Formal front path | Moderate | Use gravel; add neat edging. |
| Long, sloping side path | Fussy | Add steps or cross‑bars. |
The pattern is simple: the more flexible the layout and the lighter the traffic, the better cardboard performs.
Common mistakes that shorten the season
Most “it didn’t work” stories come down to the same handful of slip‑ups. They’re easy to avoid if you know them in advance.
Not overlapping enough
A neat, almost‑touching join is basically a welcome mat for grass and bindweed. Think shingles on a roof, not tiles on a kitchen floor.Skipping the soak
Dry cardboard behaves like a kite. Even a small breeze finds its way underneath. Wet it first, then add topping before it dries again.Going too thin on the topping
Two centimetres of woodchip looks pretty for a week. Then you’re back to green flecks everywhere. Be generous at the start; you can always rake a bit away later.Using the wrong cardboard
Shiny, plasticky or heavily coloured boards take longer to rot and can shed bits into the soil. If it looks like it would survive a puddle for days, don’t bury it.Ignoring perennial bullies
Couch grass, bindweed and brambles laugh at a single layer. Either spot‑dig the worst roots first or accept you’ll be spearing the odd survivor with a trowel when it appears.
Let’s be honest: nobody actually strips every last root out of an old path before starting. Cardboard layering is about tipping the balance so the weeds are occasional, not constant.
How long it lasts-and then what?
For most UK gardens, a double layer of cardboard with a decent topping will give you:
- A reliably clear path for one full growing season.
- Serviceable coverage for 12–18 months before it’s mostly gone beneath the surface.
Under bark or woodchip, the cardboard gradually melts into the topsoil. Under gravel, it decomposes faster where water gathers and slower where it stays drier, but it will still vanish.
When it’s clearly broken down-soft, tearing easily if you poke a finger down-you have choices:
Top up and repeat
Add a fresh layer of cardboard over any remaining bits, soak and cover again. This is ideal on allotments and rotating veg plots.Convert the path into a bed
Scrape the topping aside, cut through what’s left of the cardboard and plant directly into soil that’s usually darker, looser and easier to work.Lift and hard‑landscape
If you’ve decided this is now a forever path, you’ll be dealing mostly with improved soil, not a web of fabric. Slabs, bricks or compacted gravel go in more easily.
The quiet advantage is what happens below your feet. While you’ve been walking, the soil community has been rearranging itself, swapping compacted, light‑baked ground for a crumbly, root‑ready layer.
What to do this week: a 30‑minute trial strip
You don’t have to commit your whole garden straight away. Pick one nuisance strip-perhaps between two raised beds or alongside the shed-and treat it as an experiment.
- Save or scrounge enough cardboard for two layers along that run.
- Lay, overlap, soak and cover with whatever topping you can get in a single barrow load.
- Take a quick photo when you finish, and another in a month.
You’ll know very quickly if this fits your garden and your patience level. For many people, that one tidy, low‑effort strip is enough to trigger the “right, everything’s getting this treatment” moment.
FAQ:
- Won’t the cardboard attract slugs?
Damp cardboard does give slugs and snails somewhere to hide, especially in shady veg plots. A thicker woodchip layer on top, plus a bit of evening slug patrol or traps, usually keeps things in balance. Around salad beds, keep the path mulches coarser and drier if slugs are a real problem.- How do I know which side of the cardboard goes up?
It genuinely doesn’t matter. What matters is overlap, moisture and coverage. Most people put any printed side down out of sight, but the worms don’t care.- Can I use newspaper instead of cardboard?
Yes, several sheets of plain newspaper work similarly, but they break down faster and are fiddlier in the wind. For season‑long paths, cardboard is sturdier. Newspaper is handy for small gaps and edges.- Is this safe for pets and children?
As long as you avoid plastic‑coated, glossy or heavily inked cardboard, yes. There are no herbicides involved, and the topping is usually bark, chip or gravel. Just watch loose stones with very small children.- What if I already have a plastic membrane down?
You can lay cardboard and mulch on top for this season, but the long‑term fix is to lift the membrane when you have the chance. Cardboard works best in direct contact with soil so it can break down and feed it.


Comments (0)
No comments yet. Be the first to comment!
Leave a Comment